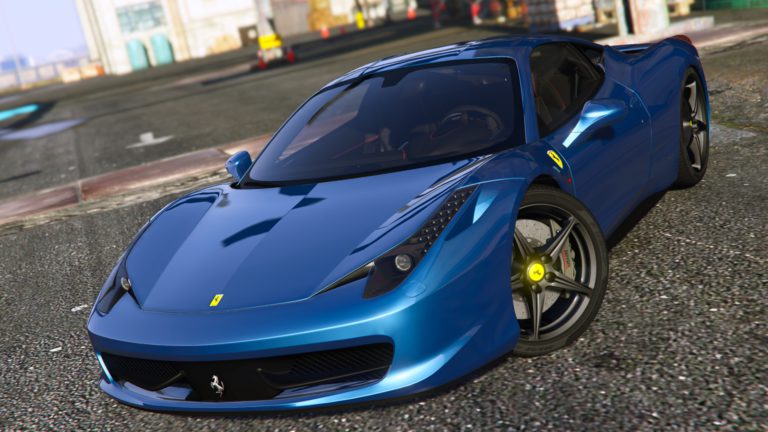
- Download a vehicle model from one of the sites listed on the previous page.
- Open Zmodeler 2.
- Click on the " Import "at the top of the screen.

- Navigate to your model in the window that opens (.dff for GTA SA | .wft for GTA IV).

- Click on " Import" .
IMPORTANT: If the vehicle has been imported and you can see it in the software's 3D views, proceed to the next step. If the " Import "The model is locked. Here's how to unlock GTA San Andreas and GTA IV models:
Unlock a GTA San Andreas model:
Unlocking a GTA IV model:
Preparing the Forza models is a little more complicated than for other GTA models, but once you've done it again and again, it's child's play!
Prepare a Forza model BEFORE Forza Horizon 3:
Prepare a model of Forza Horizon 3:
In the case of a professional 3D model of a vehicle, it is preferable to purchase it in the .OBJ. The same goes for vehicles from other games. I don't know how to prepare vehicles for all the games out there, but many of them are available in .OBJ on gamemodels.
Importing an .OBJ model into Zmodeler 3 :
- Simply open Zmodeler 3 and click on the " " button. Import "Then select your vehicle.

- If the vehicle is not correctly aligned, use the rotation tool. Modify "and set it as shown in the image:

- Select the entire model in the "View" mode Left " Then click on the model and rotate it through 180°, 90° or whatever the position of your model is, to have the vehicle rotate in this direction in the " " view. Left " :

To switch to view mode Left " :

Don't forget to activate all these options, as shown in this screenshot, to get a correct view:

On another view, switch to "View" mode 3D "as you did for the mode". Left "Then activate these options:

- Once the vehicle is in the right direction, and still fully selected, go to " Properties "and navigate to " Mesh " ► " Vertices " ► " Format "then tick the boxes: " Normals " , " Tangents " , " Primary Color " , " Secondary Color "and define " Max Rig Bones " on 0 then " UV Channels " on 2. Click somewhere on the right and then click on ". Apply " :

The last step before starting work is to adjust the vehicle size. For other GTA or Forza models, the size is often already correct, but it may need adjusting. And professional 3D vehicles are rarely the right size!
To adjust the size, you'll need to base it on the size of the vehicle you wish to replace, or use it as a basis for subsequent Add-On installation (Don't panic, we'll talk about it later in this tutorial!). Let's say you want to mod a BMW coupe, the vehicle that most closely resembles this type of vehicle in the game is the Sentinel, for a Porsche it would be the Comet, a Lamborghini the Vacca... etc... For my car the vehicle that most closely resembles my Lexus GS-350 is the Oracle:

If you don't know all the vehicles in the game by heart, go to THIS SITE through your Social Club account. If you don't have an account or just don't want to log in, there are a number of ways to do so THIS SITE.
- Open OpenIVIf this is your first launch, follow the software instructions.
- Make " CTRL + F3 "to open the search tool. Type the name of your vehicle followed by ". .yft " (" oracle.yft "for my part). Several vehicles will then be found. If you have already replaced the vehicle, take the one that is not found. NOT in the " Mods " (generally at the bottom of the list). It is possible that there are more than two results unlike mine and that the vehicle is found in several copies in the files of updates, try to take the one that is in the folder " ". x64e.rpf " (it'll be there if it's a vehicle present in the game from launch and not one added in DLC) :

- Double-click on the vehicle and you'll be redirected to its folder. There will now be at least 3 files: a " .yft " a " _hi.yft "and a " .ytd " a fourth " +hi.ytd "is present. Simply locate the " _hi.yft "it's the only one we're interested in:

- Click on the file in question and then drag and drop it somewhere on your PC - I put it on the desktop:

- Now return to Zmodeler 3 and click on the " button. Import " :
- Select your vehicle, then click on Import " :

- You will now find yourself with the game vehicle imported into Zmodeler 3 :

- Still with your model selected, take the " Moove "and set it like this:

- Click and hold on your vehicle, then move it to align its front wheel (or at least the wheel arch if your model has no front wheel) with that of the GTA V model, as shown in this screenshot:

- If your vehicle is too large, you need to reduce it using the " Scale " :

- Click and hold the SHIFT and dragging the mouse downwards to reduce the vehicle, or click on it and tick the "Vehicle" box. All axes "and THEN select the desired size (in percent), set to 50 to reduce the size by 2, for example. Make the necessary adjustments to obtain a vehicle of the right size, as shown in the previous screenshot.
- Once the size of your vehicle matches the GTA vehicle you imported, delete the imported vehicle from Zmodeler 3 by right-clicking on its folder in the right-hand hierarchy (oracle_hi in my case) and then selecting " Delete " .
 English
  Français